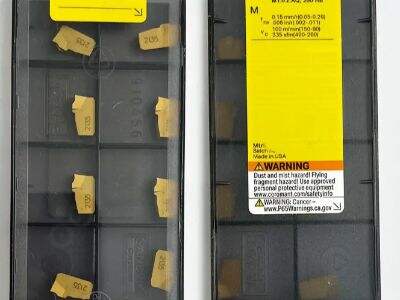
Стандартна употреба ЦНЦ машине, као што вероватно већ знате, јесте да је прецизност на првом месту. Прецизност се односи на то колико је прецизна ваша машина у сечењу и обликуњу, што је од кључне важности за производњу квалитетних производа. Оваква прецизност се може постићи само пажљивом поставком и калибрацијом ваших алата. Или можете створити заиста добар производ или ћете се увалити у озбиљне проблеме који могу уништити ваш рад тако што ћете то учинити. Овај водич ће вам пружити неке моћне савете о томе како да подесите и калибрирате ЦНЦ алате са Хуазицхун висококвалитетним производима.
Савете за постављање ЦНЦ алата
Увек треба да осигурате да су ваши ЦНЦ алати чврсто заплетени приликом постављања. Запчавање је термин за држање алата фиксираним тако да не клизне док машина ради. Вибрације могу да промене ваше мерење у случају да уређај није чврст. То може изазвати грешке у резањима или облицима које покушавате да произведе. Да бисте то спречили, проверите да ли се користи исправна сила за запљакњање, односно сила на којој се држите алата. Потребан је прави држач алата за ваш алат. Помислите на држач алата као на држење за ваш алат који га држи у одређеној позицији.
Након што задржите алат, морате добро разумети конфигурацију и димензије алата. То ће укључивати разумевање колико је алат широк, који углови има и дужине резаних ивица. Сви ови мерења су критична јер ће вам омогућити да подесите одговарајуће брзине и подаци за ваш алат. Брзина је брзина која се алат окреће, а храни је брзина која се алат креће кроз материјал. Када је исправно измерена, ваш инструмент може да функционише на најбољи начин. Такође може дати тачне резултате.
Водич за најбоље праксе: Калибрирање ЦНЦ алата
Калибрација је само фансирана реч за добијање ЦНЦ машине да уради у великој мери оно што је намењено да уради. Чин калибрирања заправо је провера и исправљање ваше машине како би се прецизно идентификовао положај алата на радном делу. Ово је заиста важно да би се све било у складу. Ево корака по кораку како да калибришете вашу ЦНЦ машину:
Корак 1: Уставити сонде за машину Сонда за машину је користан уређај за мерење који помаже вашем ЦНЦ машини да прецизно локализује ваш деловић. Машинске сонде постоје у многим врстама, али њихова основна функција је увек иста. Они воде вашу машину о томе где да почне и како се тачно креће.
Корак 2: Користите неку врсту блока за калибрирање собе. Гейж блок је стандардизовани мали блок са тачно познатом висином. Поставићете блок за мерење на радни сто ваше машине. Затим измери висину блока за мерење са машином за собу. Од тада морате калибрирати машину тако да би висина била правилно прочитана. Овај корак је неопходан да би се осигурало да машина зна колико су далеко мерења.
Корак 3: Покрените циклус сондаже. То је извршавање сета мерења помоћу софтвера ваше машине. Ваша машина ће истражити дело и ухватити мерења како би сазнала где се све налази. То ће омогућити машини да схвати димензије радног комада.
Четврти корак: Поправите подешавања ваше машине. Сада када је ваш уређај прошао кроз циклус сондаже, можда ћете желети да прилагодите / побољшате његову конфигурацију. То је тако да генерише тачне резултате на основу онога што је управо сазнао у циклусу сонда.
 EN
EN
 AR
AR
 BG
BG
 HR
HR
 CS
CS
 DA
DA
 NL
NL
 FI
FI
 FR
FR
 DE
DE
 EL
EL
 IT
IT
 JA
JA
 KO
KO
 NO
NO
 PL
PL
 PT
PT
 RU
RU
 ES
ES
 SV
SV
 IW
IW
 ID
ID
 LV
LV
 LT
LT
 SR
SR
 SK
SK
 SL
SL
 UK
UK
 SQ
SQ
 ET
ET
 HU
HU
 TH
TH
 TR
TR
 FA
FA
 AF
AF
 MS
MS
 MK
MK
 KA
KA
 UR
UR
 BN
BN

